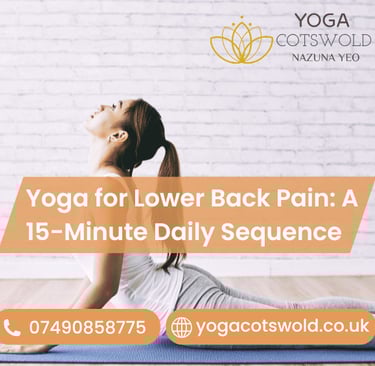
Yoga for Lower Back Pain: A 15-Minute Daily Sequence
Yoga for lower back pain brings quick relief. Practice this 15-minute daily sequence to improve flexibility, strengthen muscles, and reduce tension.
HEALTH TIPS
11/3/20257 min read

Usually, Lower back niggles can creep into everything—even tying your shoes,standing in queues,sitting at a desk,,still,you don’t always need a long class to feel relief. Moreover,Practised with care, a short, consistent routine ease tension around the lumbar spine , stabilise the core, and can loosen stiff hips. Consequently Below, I share a 15-minute daily sequence I teach at YOGA COTSWOLD that is gentle, focused and easy to fit into busy mornings. Though this isn’t a substitute for medical care, it often helps you move more freely. On top of that , it builds a habit of self-care that pays off long term.
Before You Start: Safety First
Initially, check in with your body. If you’re recovering from surgery,you have osteoporosis,disc herniation,sciatica, or acute pain, consult a clinician before you begin. After that , move slowly and breathe steadily; here,sharp pain is your cue to stop. Finally, keep two folded blankets, a yoga belt and a pair of blocks nearby. ConsequentlyProps allow you to adapt each posture to your unique alignment. Get details on Yoga Teacher in Leckhampton.
Why a Short Daily Practice Works
Apparently,Consistency beats intensity. Since, the lower back responds to gentle mobility plus simple strength, 15 minutes daily often outperforms an occasional hour. On top of that , repeated practice rewires movement habits: however you’ll hinge at the hips more, brace the core better and distribute load away from the lumbar area. Finally, you create supportive patterns that last beyond the mat.
The 15-Minute Sequence (Pose-by-Pose)
Set a soft timer. You can Breathe in and out through the nose. Besides this, If time feels tight, cut each stage to 60 seconds and still reap benefits.
1) Constructive Rest with Diaphragmatic Breathing — 2 minutes
Apparently,You can Lie on your back, feet hip-width,knees bent,. Furthermore, Place one hand on your belly, the other on your ribs. In addition,Inhale to expand the ribs sideways; exhale to soften the jaw and floor the shoulder blades. Consequently,This resets the nervous system, reduces guarding and primes your core to switch on gently.
Cue: Additionally,Imagine the pelvis as a bowl; level it so it neither tips forward nor back.
2) Pelvic Tilts — 60 seconds
Still on your back, exhale to curl the tail slightly (flattening the lower back), inhale to release to neutral. Small, silky movements. Consequently, you lubricate the segments without forcing range.
Avoid: Aggressive rocking or pushing into pain. Looking for a Yoga Teacher in Pittville?
3) Supine Hamstring Stretch (with belt) — 1 minute each leg
Apparently,Loop the belt around the ball of your right foot; extend the leg comfortably. Moreover,Keep the opposite knee bent or straight, whichever feels kinder. Additionally,As you exhale, soften the shoulders.Then Tight hamstrings tug on the pelvis; this , lengthening them eases lumbar strain.
Option: moreover,externally and Internally rotate the leg to explore different fibres.
4) Figure-Four Hip Release — 60 seconds each side
Cross right ankle over left thigh. Thread the arms to hold behind the left hamstring. Then, draw the legs in as you press the right knee away. You’ll target the deep lateral hip (piriformis), which frequently grips when the back is sore.
Tip: you can naturally keep the sacrum heavy; don’t yank the knee. Get details on Yoga Teacher in Prestbury.
5) Cat–Cow (Marjaryasana/Bitilasana) — 60 seconds
You can ,Come to knees and hands hips over knees,shoulders over wrists,. Besides this, Inhale to extend the spine (cow), then exhale to round (cat). Move slowly and match breath to motion. Consequently, you mobilise each vertebra without compressing the lumbar region.
Fine-tune: moreover Keep the ribs gently drawn in to prevent over-arching.
6) Thread the Needle — 45 seconds each side
Additionally,From all fours, you can slide the right arm underneath the left, resting the right temple. On top of that Breathe into the shoulder blade area. Apparently,This release encourages rotation through the thoracic spine, which usually compensates for a stiff lower back.
Variation: You can Place a block under the head for extra support.
7) Low Lunge (((Anjaneyasana))) with Hip-Flexor Focus — 45 seconds each side
Step the right foot forward, left knee down. Pad the knee if needed. Moreover, Lift through the chest; tip the pelvis slightly under to lengthen the hip flexors. Since tight flexors pull the pelvis forward, freeing them helps your back instantly.
Add-on: Besides this, Reach the left arm up and side-bend right to track the psoas line. Looking for a Yoga Teacher in Stow-on-the-Wold?
8) Half Splits (Ardha Hanumanasana) — 45 seconds each side
From lunge,you can shift the hips back so the front leg lengthens. Moreover,fold from the hips and Keep the spine long .Consequently, You’ll now balance the lunge by lengthening the hamstrings again while maintaining a neutral spine.
Support: Hands on blocks to avoid rounding.
9) Baby Cobra (Bhujangasana variation) — 60 seconds
Lie prone, legs long, tops of feet pressing.In addition hands under shoulders (low cobra). Or Place forearms down (sphinx) . Moreover,Inhale to broaden the collarbones; then exhale to engage the lower belly so the back doesn’t jam. consequentlyYou build endurance in the back extensors while protecting the lumbar curve.
Less is more: Keep the neck long and gaze slightly forward.
10) Bridge Pose (Setu Bandha) — 60 seconds
Additionally,Return to your back. Feet parallel, hip-width. In addition,Exhale to anchor the feet; inhale to peel the pelvis and spine up one step at a time. Besides this, hold for three slow breaths, then roll down. Apparently,this strengthens hamstrings and glutes, which stabilise the sacrum.
Refinement: Additionally,Squeeze a block lightly between the knees to keep alignment. Get details on Yoga Teacher in Northleach.
11) Supine Twist (Jathara Parivartanasana, gentle) — 45 seconds each side
Drop both knees to the right, arms wide. Keep the shoulders grounded. Twists wring out residual tension; however, stay soft and avoid forcing the turn.
If sensitive: Place a pillow between the thighs.
12) Knees-to-Chest to Rock & Reset — 30 seconds
Gather the knees, sway gently and breathe out the last bits of gripping. Release the jaw; smile if you can.
13) Supported Savasana — 1 minute
Feet wide, knees resting on one another or calves on a chair. Cover the body if you’re cool. Let the floor carry you. Therefore, your nervous system files the practice as “safe”, allowing tight muscles to stop guarding. Looking for a Yoga Teacher in Moreton-in-Marsh?
Technique Essentials: Small Things That Change Everything
Neutral pelvis: In standing or seated postures, imagine your tail and pubic bone dropping evenly. This immediately reduces lower back compression.
Core before range: Activate the low belly on each exhale. Then add movement. Consequently, you protect the lumbar area while you explore more space.
Hip mobility first: Free the hips and mid-back; the lower back will stop overworking.
Props are smart, not a weakness: Blocks under hands, bolster under knees—these create optimal angles and reduce strain.
Lifestyle Tweaks That Support the Sequence
Even the best routine struggles against poor daily habits. Therefore, try these quick wins:
Chair check: you can Sit with feet flat, hips slightly higher than knees;then place a rolled towel at the sacrum.
Micro-breaks: Every 45 minutes, do five pelvic tilts,breathe, and stand.
Walk daily: Additionally,Ten brisk minutes calm the nervous system and increase circulation .
release and Heat : usually,A warm shower before practice softens tissue; then a cool pack afterwards can settle inflammation if you’ve over-done things.
Who This Sequence Suits (and Who Should Modify)
ApparentlyThis programme suits most adults with post-exercise soreness,mild stiffness from sitting, or muscular tightness . Anyhow, if you experience numbness,radiating pain pins and needles,, below the knee, unexplained weakness, night pain or fever, seek professional assessment. Besides this, pregnancy requires tailored variations; please get in touch and I’ll adjust your plan safely. Get details on Yoga Teacher in Andoversford.
A Sample Weekly Plan
Mon–Fri: you can Do the full 15-minute sequence.
Saturday: additionally,you can Enjoy a gentle walk or a longer practice in the Cotswolds.
Sunday: Rest or repeat the breathing and constructive rest elements only.
Track your pain on a 1–10 scale each evening; celebrate even small improvements.
Work with Me at YOGA COTSWOLD
I’m NAZUNA YEO, and I specialise in therapeutic yoga, calm cueing and evidence-informed sequencing. In addition,Book a 1-to-1 if you’d like me to teach safe core work,adapt the routine for scoliosis or assess posture, . Consequently,Together, we’ll craft a plan that fits your day and respects your body.
Related Articles:
» Yoga Teacher in Swindon Village
» Yoga Teacher in Upper Slaughter
» Corporate Yoga Trainer in Cheltenham
» Group Yoga Classes in Cheltenham
Making Yoga a Habit for Lower Back Health
Lower back care doesn’t require heroics; it asks for attention, breath and regularity. Hence , refine your form over time,move with kindness, and invest a quarter of an hour each day, . At the same time , remember that small improvements compound. Consequently, you’ll notice easier transitions,steadier posture, and, most importantly, a calmer relationship with your body.
FREQUENTLY ASKED QUESTIONS
1) Is it ok to do this sequence if I’m brand new to yoga?
Yes, absolutely. The routine uses straightforward shapes and clear breath cues. Moreover,Start slowly, use a belt or blocks and reduce time in any pose that feels intense. Therefore,As your confidence grows, you can add a few breaths to each stage.
2) How fast will my back feel better?
Everyone differs; anyhow, many students notice less morning stiffness and easier bending within one to two weeks of daily practice. Consequently,Consistency matters more than pushing deeper on day one.
3) What if I feel discomfort during a pose?
Back out a little, return to neutral spine, and breathe. If the discomfort persists or becomes sharp, stop and rest in constructive rest. Pain that radiates, tingles or numbs deserves a medical check.
4) Are there any poses which I should avoid with lower back pain?
Apparently,sudden twists,strong backbends without core engagement,and deep forward folds with a rounded back, can aggravate symptoms. Moreover , choose supported versions and keep your breath smooth. When in doubt, reduce range and keep the pelvis stable.
5) Can I pair this with other exercise?
Certainly. Additionally, gentle strength work,swimming and walking, complement yoga beautifully. Besides this, do yoga either after exercise or after a warm shower when tissues feel pliable. On top of that, avoid heavy lifting immediately after deep hip releases; give your body ten minutes to integrate.
Contact
info@yogacotswold.co.uk
Social Media
Get in Touch
07490858775


Address: GEORGE MOORE COMMUNITY CENTRE- BOURTON ON THE WATER
Moore Road, Bourton on the Water GL54 2AZ